Approvals are a core component in many Power Automate flows – I’ve personally created numerous approval workflows over time.
While using Nintex Workflows for Office 365, you could easily configure fallback actions when approvals are missed, such as when the responsible person is on vacation or simply overlooks the notification.
However, handling these scenarios in Power Automate requires a different approach.
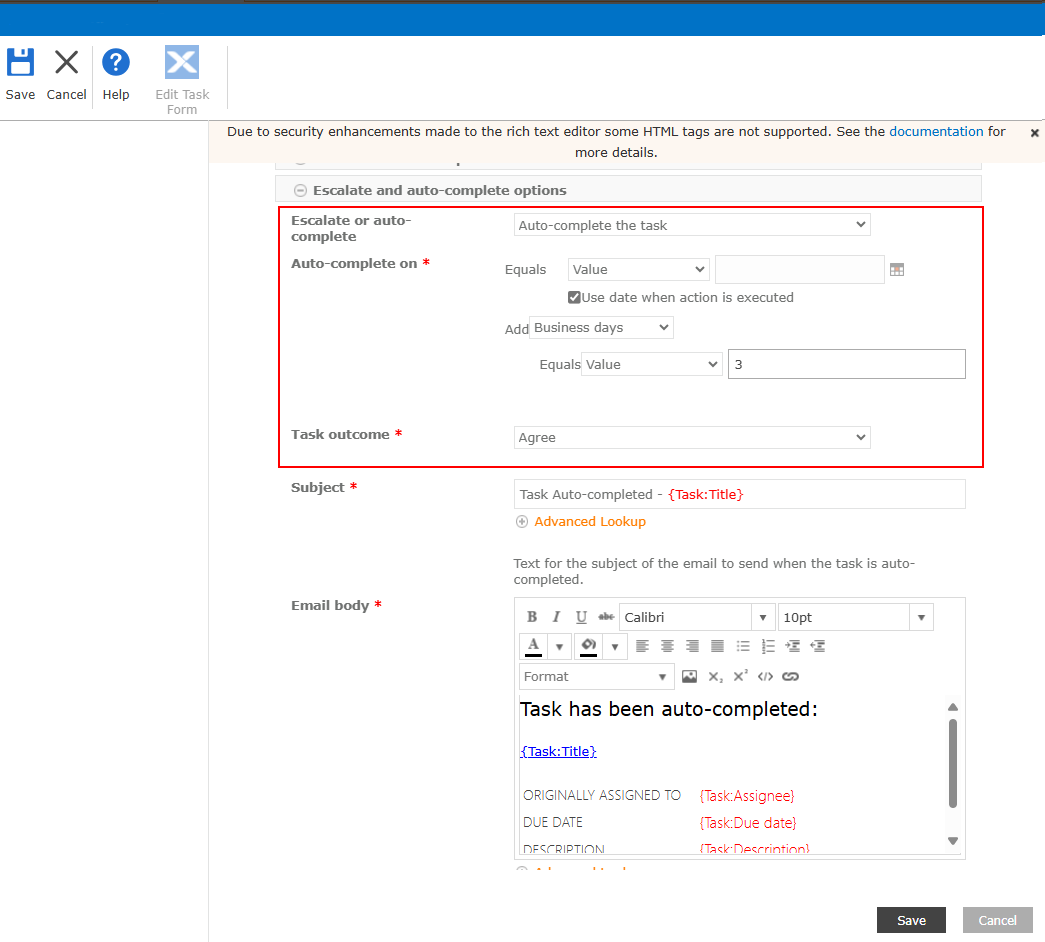
The screenshot provided shows how you would configure an approval action in Nintex Workflow for Office 365 that would automatically resolve to Agree (approval) after three days without the input of the responsible user.
Power Automate is capable of providing the same functionality but not as easy as Nintex. In this post I am going to show you how you can configure the same auto-completing behaviour in Power Automate.
Hint: This is not only useful for letting your flow work on but also in regards to the 30 days limit that would end the flow no matter what.
Setting up an approval
First, we’ll need to add a Start and wait for an approval action. Complete all the necessary fields in the Parameters tab to configure it according to your specific requirements.

The next step is defining the timeout-duration – meaning the time the approval should wait until it continues the flow execution.
To do so open the Settings-tab in the action editor.
The neccessary configuration is Action timeout (as you might have guessed by the name).
The value of Action timoeut is written in a ISO8601-Duration-Notation notation.
To let the action wait for three days before it gets automatically concluded, we are setting the value to P3D meaning, wait a Period of three days.
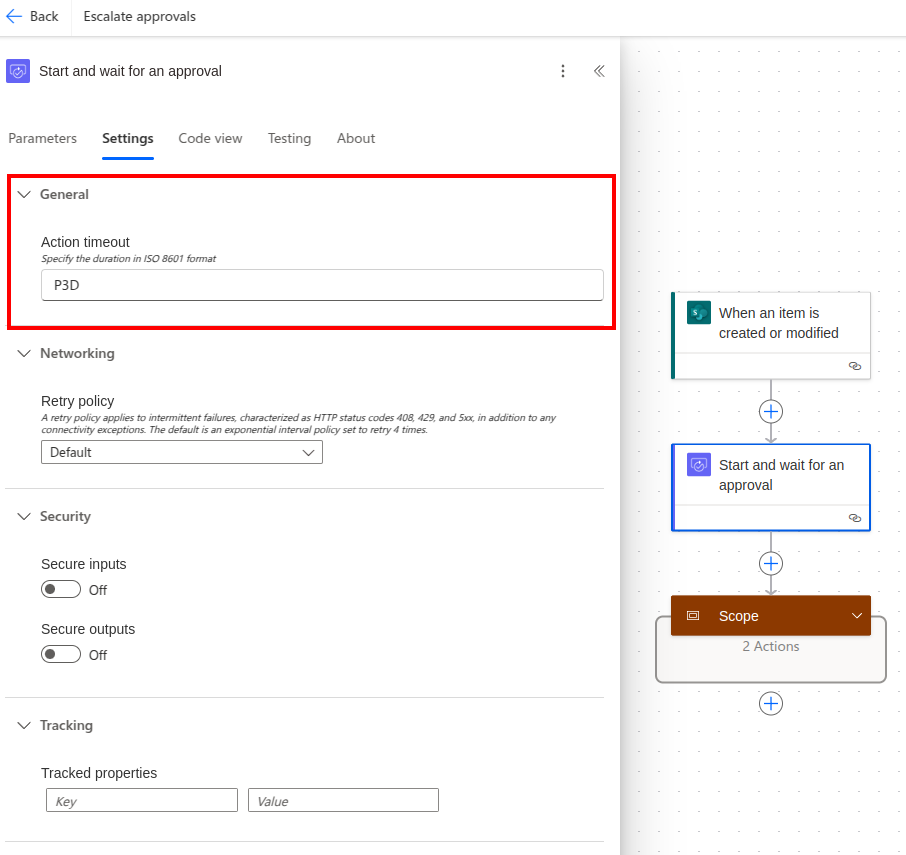
Next, define the timeout duration – the time the approval should wait before continuing the flow execution.
Open the Settings tab in the action editor.
Look for the Action timeout configuration (which is aptly named). This value uses ISO 8601 duration notation.
To set the action to wait three days before automatically concluding, enter P3D, which means ‘Period of three days’
Handling the auto-completion
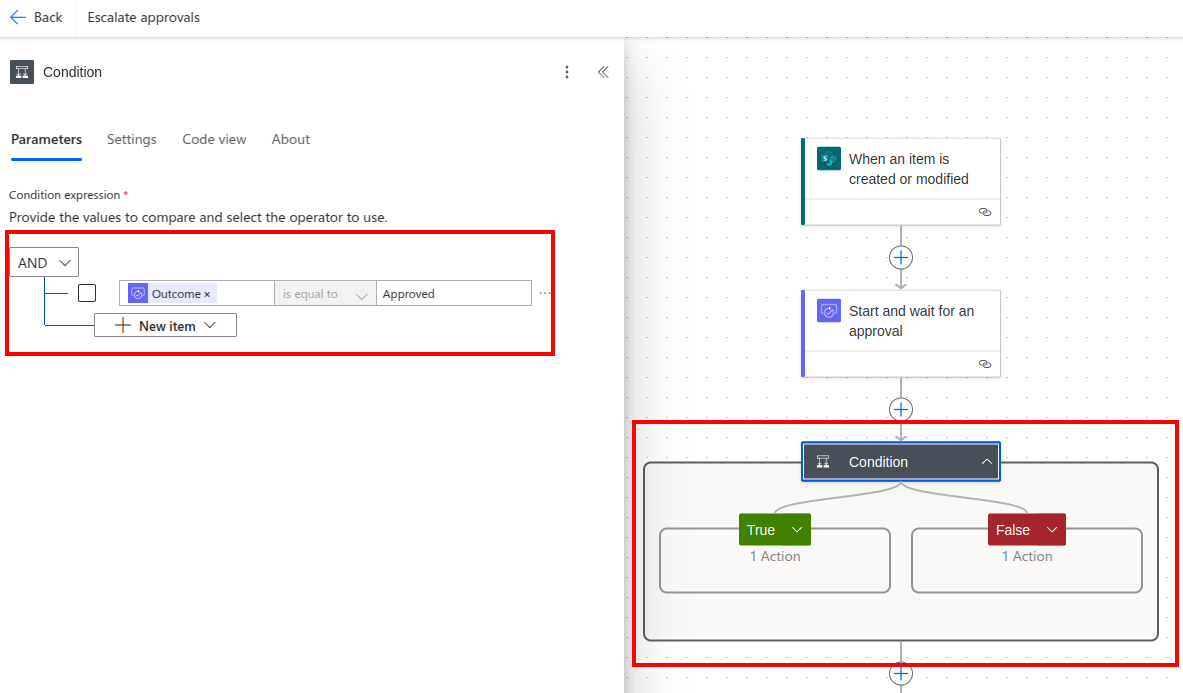
Now that the approval action is set up, it’s time to handle its outcomes.
First, add a condition to respond to the user-triggered completion of the approval action.
Now that we have the expected execution covered, its time to handle the unexpected (the auto-completion).
Add a scope and call it something like Handle auto-completion.
Open the scope editor, navigate to Settings -> Run after.
By default the previous action will be shown with a selected state of Is successful.
Now add the Start and wati for an approval action and set the selected state to Has timed out-
Every time the approval action times out, the scope will be triggered.
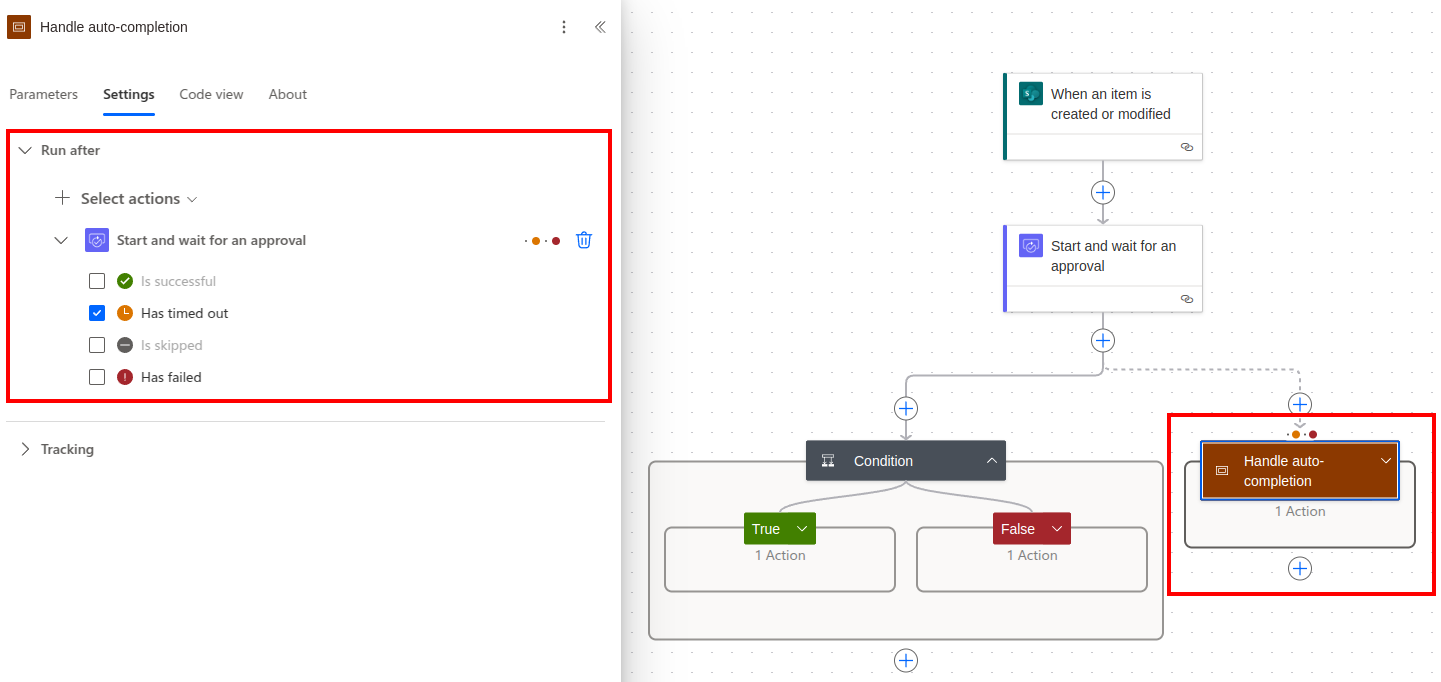
Now that we have the expected execution covered, it’s time to handle the unexpected scenario – auto-completion.
Add a Scope and name it something like ‘Handle auto-completion’.
Open the scope editor and navigate to Settings → Run after. By default, the previous action will be shown with a selected state of ‘Is successful’.
Add the Start and wait for an approval action and change its selected state to Has timed out. This ensures the scope will be triggered whenever the approval action times out.
Wrap up
That’s it! You can now handle both the regular completion of approval tasks and the exception where an approval is neither granted nor rejected.
Typically, this exception would trigger some form of escalation – perhaps renotifying the responsible user about the pending approval, or rolling back changes made by the flow prior to the timeout.
Leave a Reply